|
Chapter 01-2: Edge Detection using the rectangular selection |
This second chapter descripes the detection of an edge in a image with the rectangular selection. The first step is to open an image, select the rectangular selection in imagej and draw a rectangle over a relevant edge in the image. Basically you could use any picture format that is working with imagej, but in industrial image processing it is common to use the bmp format. Almost any camera is supporting the bmp format and there is no loss of information in the image due to compression. Befor starting the process of the edge detection you should convert your image to a 8-bit grayscale image. The three channel colour image is not needed for edge detection.
|
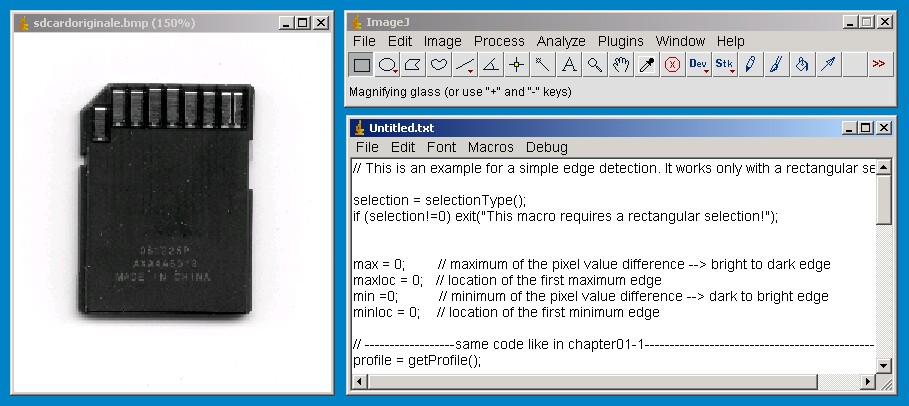
Step 01: The start-up image |
This is the sdcard example startup image. I simply scanned a sd-card and saved it as a 8-bit bmp-image. Basically you can use any image, but for elementary understanding I suggest an image with a sharp and clear edge. And to compare the results its better you work in this chapter with the same image you were using in chapter01-1. The subject discribed in chapter01 are the basics for further measurement tasks.
|
Step 02: “Rectangular selection” and the “Plot Profile” command |
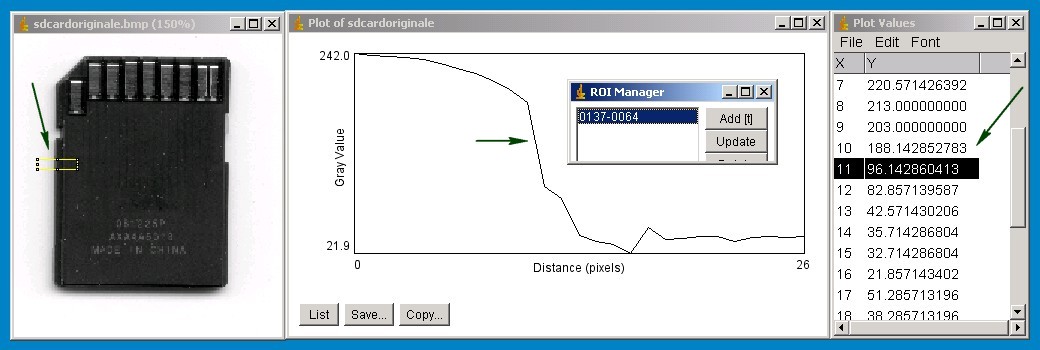
The image on the left side shows the rectangular selection. By pressing the shortcut "strg+t" the roi will be added to the roiManager. This way you can reuse the same roi again, or even save it in a roi-file. The plot image on the rightside shows the corresponding plot of the pixel values. Like you can see it is not very hard to localize the edge of the sdcard. The most distinct edge is supposed to be where the difference of the pixelvalue has his maximum. So the next step would be to compute the difference of each pixelvalue of the selection and his neighbour pixels to get the maximum difference in the selection. You can also press the "List" button on the Plot-window to see the mean pixel value for each pixel-row in the roi.
|
Step 03: Compute the maximum difference |
Some simple code sample for the imagej macro language. Just copy the code into a new imagej text window and run the macro.
// This is an example for a simple edge detection. It works only with a rectangular selection.
selection = selectionType();
if (selection!=0) exit("This macro requires a rectangular selection!");
max = 0; // maximum of the pixel value difference --> bright to dark edge
maxloc = 0; // location of the first maximum edge
min =0; // minimum of the pixel value difference --> dark to bright edge
minloc = 0; // location of the first minimum edge
// ------------------same code like in chapter01-1-----------------------------------------------
profile = getProfile();
for (i = 0; i < profile.length-1; i++)
{
//print("pixel value at i and i+1: ",profile[i]," ",profile[i+1], " i = ", i);
difference = profile[i]-profile[i+1];
//print("difference at i: ",difference);
if (difference>max) {max = difference;
maxloc = i;
};
if (difference<min) {
min = difference;
minloc = i;
};
//print("max: ",max," min: ",min);
}
print("max: ",max," min: ",min);
//--------------here starts the decision for the edge-type------------------------------------------
getSelectionBounds(rectstartx, rectstarty, width, height);
if (min*(-1)<=max) // compute: bright to dark edge
{
cornerpointx = rectstartx + maxloc;
cornerpointy = rectstarty + height/2;
print("cornerpoint x (max): ",cornerpointx," cornerpoint y: ",cornerpointy);
};
if (min*(-1)>max) // compute: dark to bright edge
{
cornerpointx = rectstartx + minloc;
cornerpointy = rectstarty + height/2;
print("cornerpoint x (min): ",cornerpointx," cornerpoint y: ",cornerpointy);
};
makePoint(cornerpointx, cornerpointy);
|
Step 04: Enjoy the results |
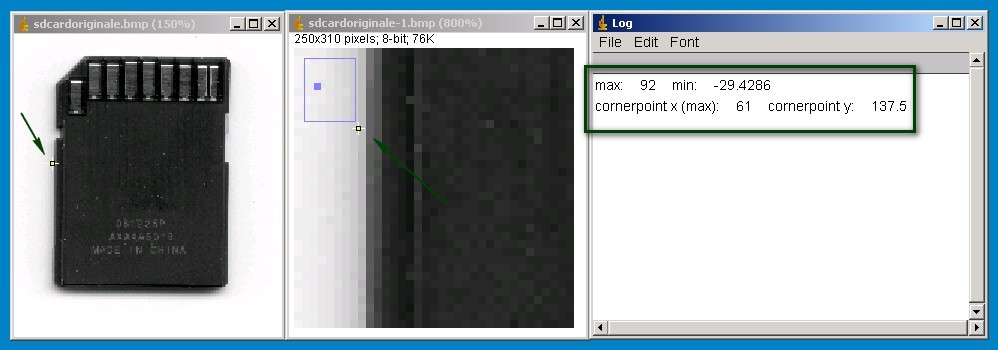
At the left side of the sd-card you can see the detected edge. The image in the middle shows a closup of the detected edge. As you can see the pixel located is actually not the first corner of the sdcard, actually it is the last background pixel. For measurements between two edges you have to be aware of this subject. The Log window shows the x-y coordinates of the detected cornerpoint. It also shows the maximum difference for a bright-to-dark corner and the maximum difference for a dark-to-bright corner. The code already is able to distinguish a dark-to-bright edge from a bright-to-dark edge.
![]()
![]()