|
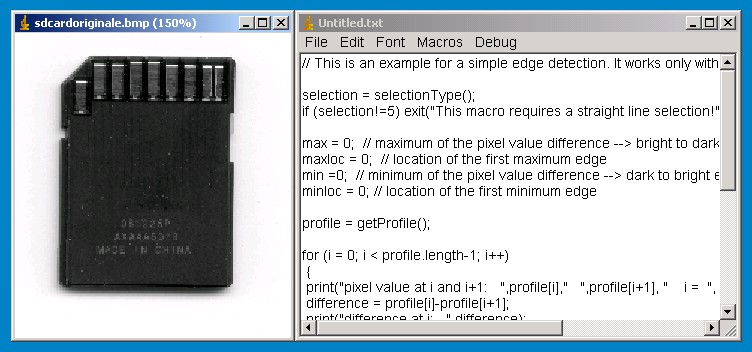
Chapter 01-1: Edge Detection using the straight line selection |
|
Step 01: The start-up image |
|
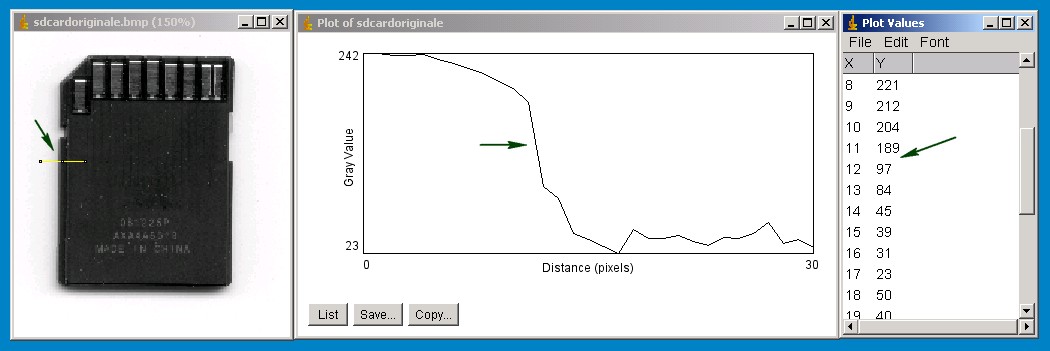
Step 02: “Straight line selection” and the “Plot Profile” command |
|
Step 03: Compute the maximum difference |
Some simple code sample for the imagej macro language. Just copy the code into a new imagej text window and run the macro.
selection = selectionType();
if (selection!=5) exit("This macro requires a straight line selection!");
max = 0; // maximum of the pixel value difference --> bright to dark edge
maxloc = 0; // location of the first maximum edge
min =0; // minimum of the pixel value difference --> dark to bright edge
minloc = 0; // location of the first minimum edge
profile = getProfile();
for (i = 0; i < profile.length-1; i++)
{
print("pixel value at i and i+1: ",profile[i]," ",profile[i+1], " i = ", i);
difference = profile[i]-profile[i+1];
print("difference at i: ",difference);
if (difference>max) {max = difference;
maxloc = i;
};
if (difference<min) {
min = difference;
minloc = i;
};
print("max: ",max," min: ",min);
}
getSelectionCoordinates(xCoordinates, yCoordinates);
cornerpointx = xCoordinates[0] + maxloc;
cornerpointy = yCoordinates[0];
makePoint(cornerpointx, cornerpointy);
print("cornerpoint x: ",cornerpointx," cornerpoint y: ",cornerpointy);
|
Step 04: Enjoy the results |
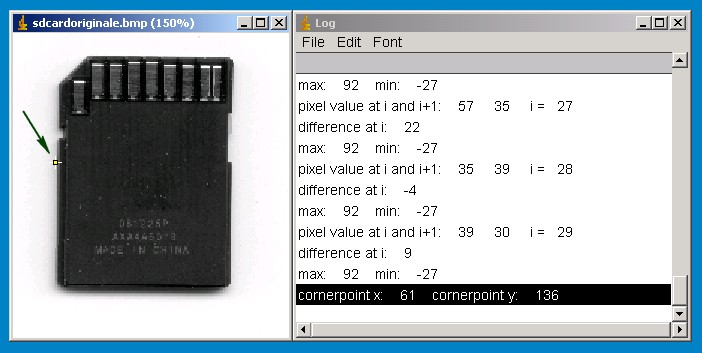
At the left side of the sd-card you can see the detected edge. The Log window shows the x-y coordinates of the detected cornerpoint. It also shows the maximum difference for a bright-to-dark corner and the maximum difference for a dark-to-bright corner. If you want to detect a dark-to-bright corner you can easy adjust the codesample. A good thing to dig deeper into programming with imagej is to play around with the code. This is good practice and makes the code more comprehendible.
![]()
![]()